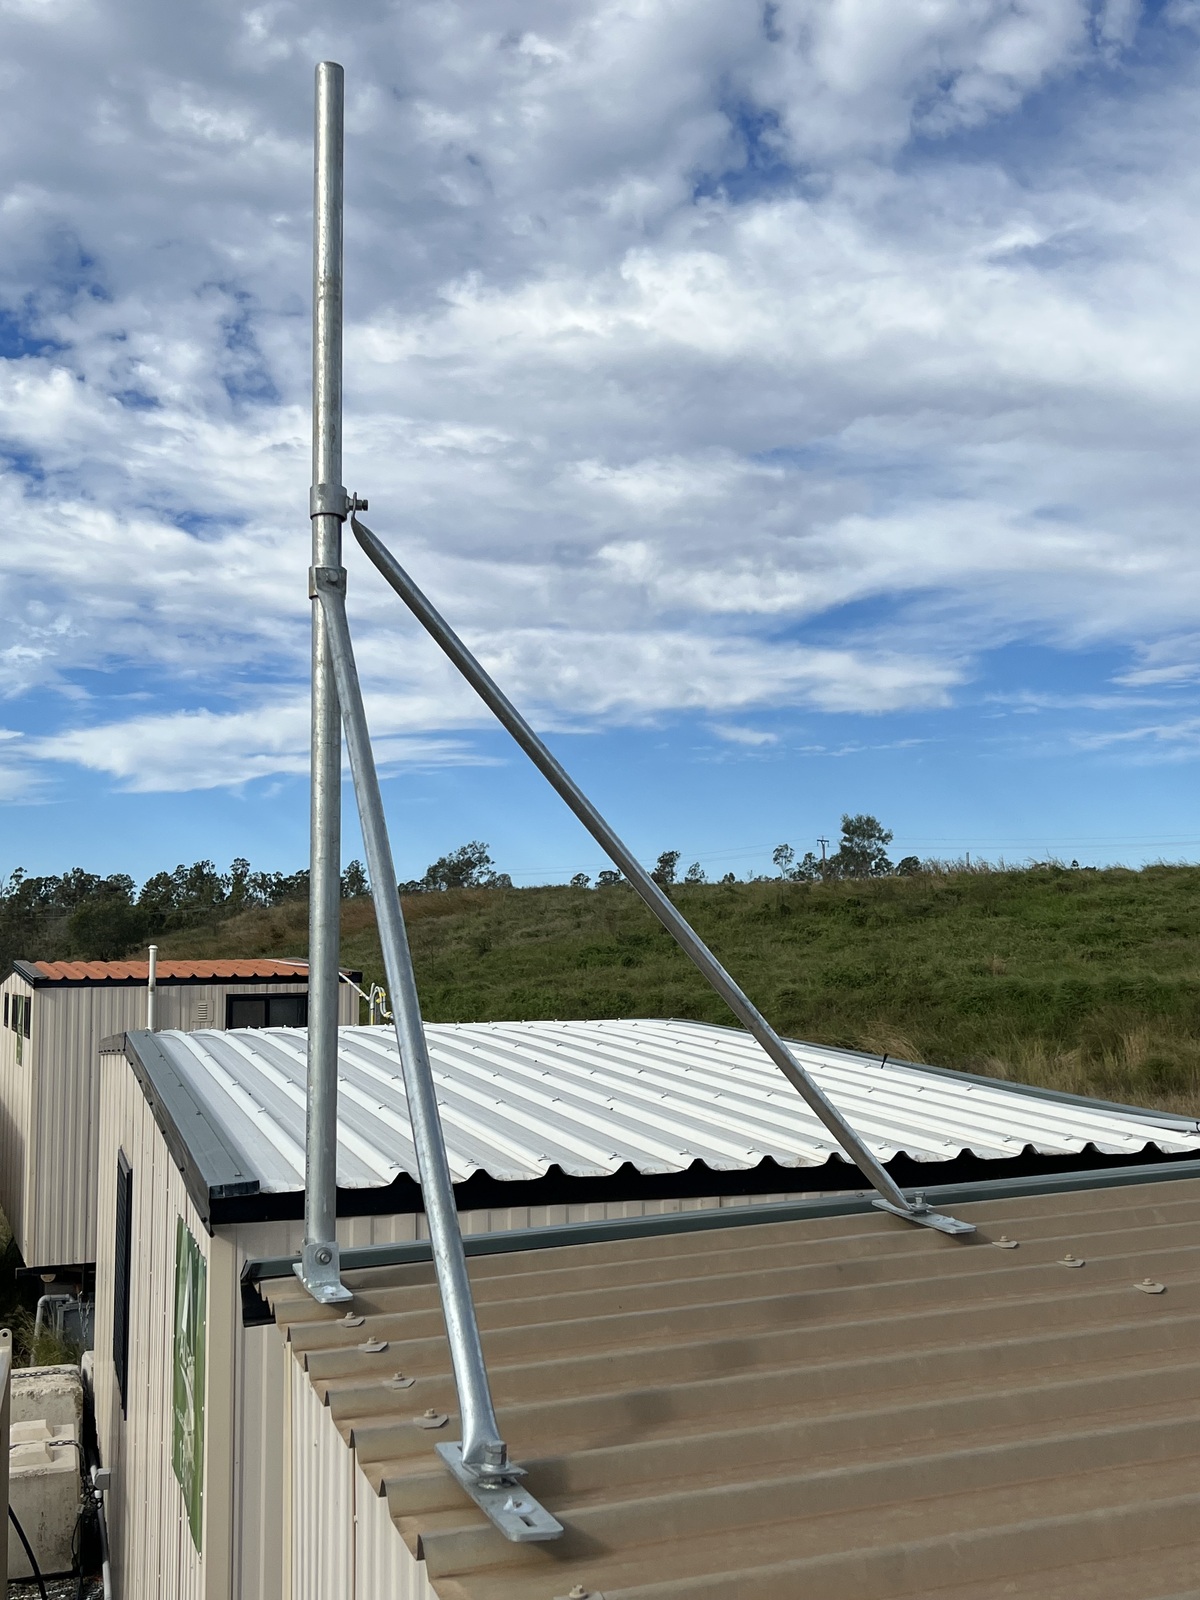
This guide outlines our standard procedure for installing a Heavy Duty Galvanised Collared Roof Mast on corrugated tin roofs. Our focus is on ensuring a solid, weatherproof installation that meets Australian compliance standards, providing you with a mast installation that can endure the harshest conditions while securely holding antennas or other equipment.
Tools & Materials We Use:
- Heavy Duty Galvanised Collared Roof Mast (50mm)
- 12G x 50mm stainless steel self-drilling screws with neoprene washers
- Electric drill with metal drill bits
- Roof flashing (for optional enhanced waterproofing)
- Selleys Roof & Gutter Silicone Sealant (compliant with Australian standards)
- Caulking gun
- Measuring tape and marker
- Safety gear (gloves, protective eyewear, harness)
Step-by-Step Installation Process
1. Location Assessment and Planning
Before we begin, we perform a detailed assessment of your roof to determine the optimal location for the mast. We look for:
- Structural Support: We choose a spot where the mast can be securely fastened into a roof rafter beneath the corrugated tin, ensuring maximum stability.
- Clear Line of Sight: We ensure the location allows for optimal signal reception, clear of obstructions like trees, buildings, or power lines.
2. Marking the Mounting Points
We use the mast's base plate to mark the exact spots where the fixing screws will be installed. This includes:
- Base Plate Marking: The base plate is positioned and aligned with the roof pitch. The hinged design of the mast allows for this adjustment.
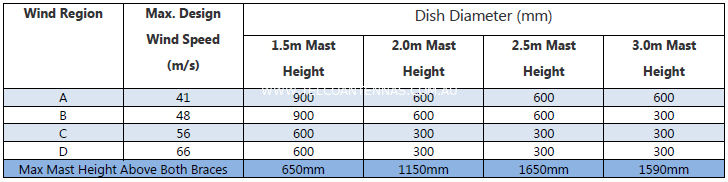
- Stay Bar Positions: We also mark positions for the support stay bars to ensure the mast has maximum stability, especially for taller installations or in windy areas.
3. Drilling the Pilot Holes
Using a drill fitted with metal drill bits, we carefully drill pilot holes where the base plate and stay bars will be secured. This step is essential to:
- Penetrate Rafters: We make sure to drill into the underlying rafters to give the mast structural support.
- Hole Sizing: The holes are drilled slightly smaller than the screws to ensure a tight fit when we drive the screws in.
4. Fixing the Mast
We securely attach the mast to the roof using 12G x 50mm stainless steel self-drilling screws with neoprene washers:
- Screwing into Rafters: We fasten the mast base plate directly into the rafters, ensuring a firm grip. The neoprene washers are crucial, as they create a watertight seal around each screw.
- Tightening Stay Bars: The stay bars are equally important for added support, especially for larger masts. These are fixed in place using the same method, ensuring they hold the mast steady even in high winds.
5. Sealing the Penetrations
To prevent any risk of water leaking through the drilled holes, we follow strict waterproofing procedures:
- Silicone Sealant Application: We apply Selleys Roof & Gutter Silicone Sealant around every screw hole and along the edges of the mast base plate. This ensures the mast installation remains watertight, even in extreme weather conditions.
- Roof Flashing: If necessary, we install roof flashing for additional waterproofing, particularly in areas prone to heavy rainfall. This flashing is fitted around the mast and sealed with silicone.
6. Final Inspection
Before we complete the installation, we conduct a final inspection to ensure:
- Stability: We apply gentle pressure to the mast to confirm that it is securely fixed and there is no movement.
- Waterproofing Check: We verify that all seals are intact, and there are no gaps around the screws or base plate.
- Safety and Compliance: We ensure that the installation complies with Australian standards, including wind load considerations and waterproofing regulations (AS 3566 for fasteners and AS/NZS 4858 for waterproofing).